TL;DR:
- A successful event photo booth requires matching equipment, proper installation, and active management to ensure guest engagement. Proper site selection, setup sequence, and attentive support are essential for creating memorable, shareable experiences. Incorporating customization and avoiding common pitfalls maximizes the booth’s impact and originality at any event.
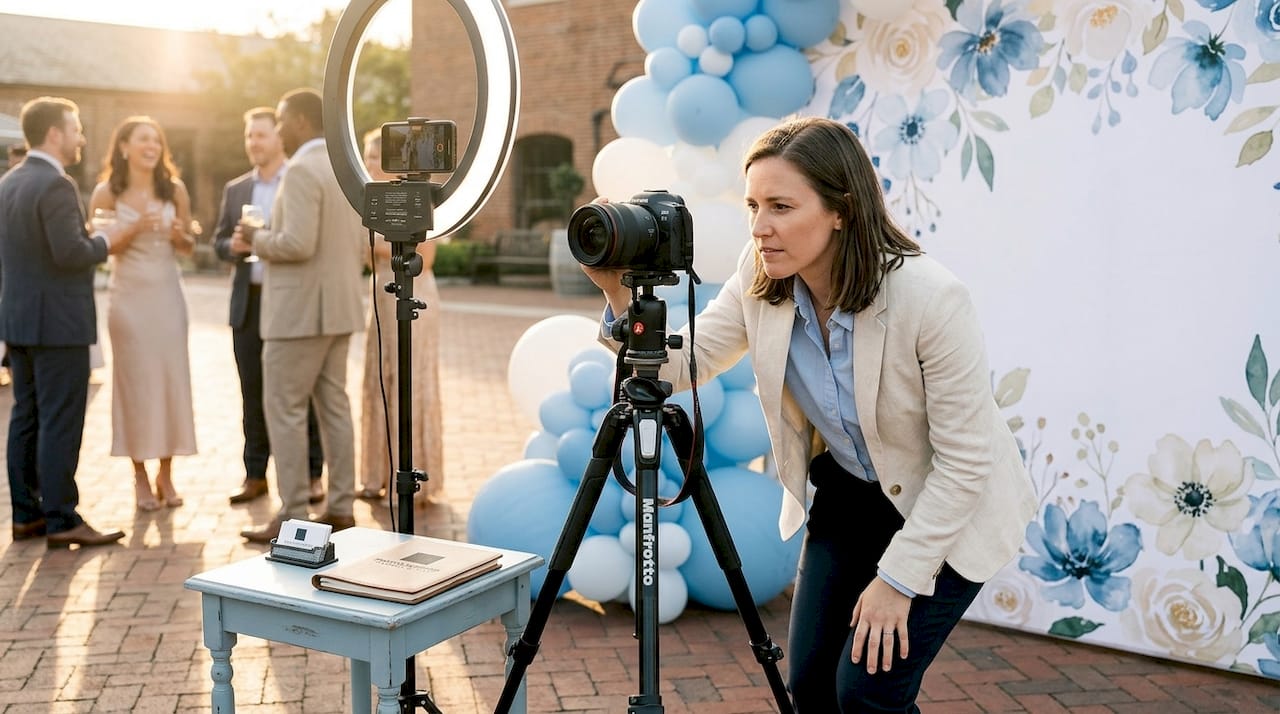
A photo booth is defined as a self-contained photography station that combines a camera, lighting, backdrop, and sharing software to create instant, branded memories at live events. When you get the setup right, a photo booth becomes the most-used attraction at your event. Get it wrong, and it collects dust in the corner while guests scroll their phones. This guide walks you through every stage of the process, from building your photo booth equipment checklist to managing the booth during the event itself, so you can create those “wow” moments your guests will treasure forever.
What equipment do you need for a successful event photo booth setup?
The right gear makes or breaks your photo booth experience before a single guest steps in front of the lens. Professional photo booth solutions range from $2,500 to $20,000 depending on technology and features. That wide range reflects real differences in output quality, guest experience, and operational complexity, so matching your equipment to your event type is the first decision you need to make.
Camera and capture hardware form the foundation of your setup. DSLR cameras like the Canon EOS Rebel series or mirrorless options like the Sony ZV-E10 deliver sharp, print-ready images. Webcams work for low-budget activations but produce noticeably softer results. For most corporate events and weddings, a DSLR with a 50mm lens is the standard choice.
Lighting is where most first-time organizers underinvest. Ring lights, softbox panels, and LED strips each serve different purposes. A ring light placed at eye level eliminates harsh shadows and flatters every face in the frame. For outdoor or mixed-light environments, a two-panel softbox setup gives you consistent, controllable illumination regardless of ambient conditions.
Backdrops and props set the visual tone of the entire experience. Sequin panels, floral walls, step-and-repeat banners, and custom printed fabric are the four most popular backdrop types for parties and corporate activations. Props like oversized glasses, themed signs, and branded frames add personality and encourage guests to loosen up.
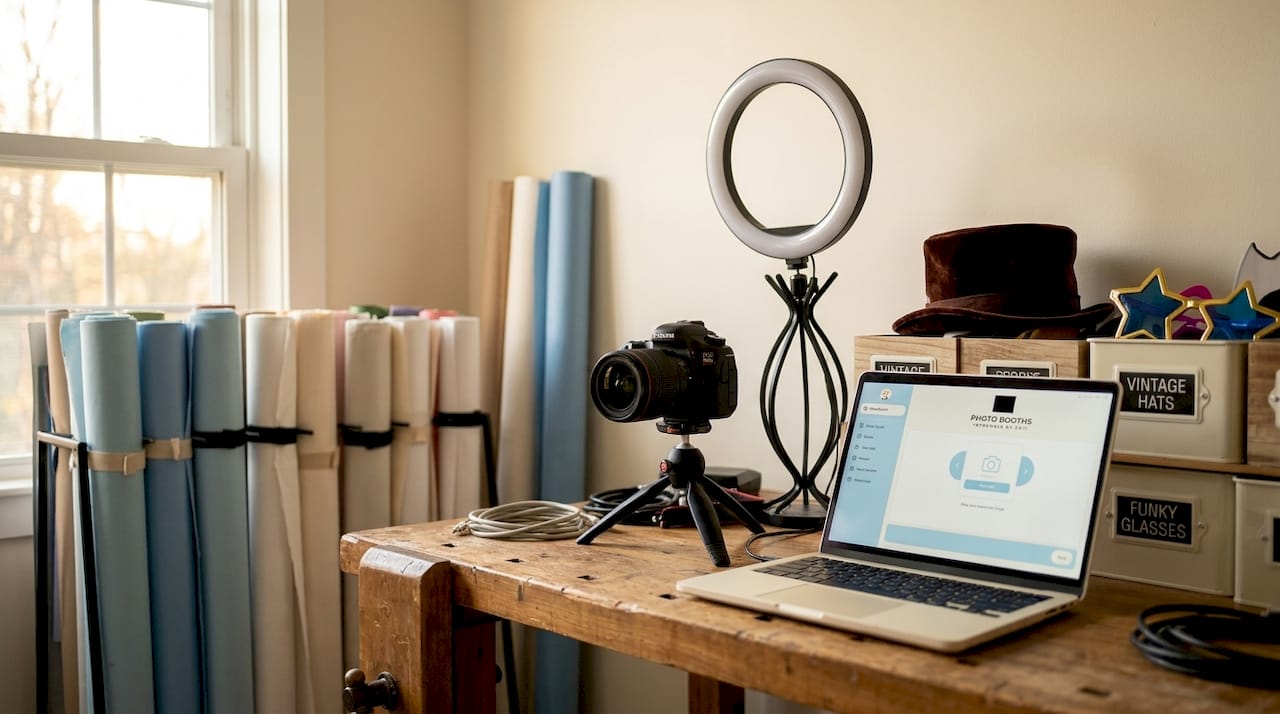
Software is the component most organizers overlook. Platforms like Darkroom Booth, Snappic, and Simple Booth HALO handle photo capture, custom overlays, branding, and social media sharing from a single interface. Engagement drops when sharing is too slow or complicated despite high-quality hardware. Choose software that lets guests receive their photo via text or email in under 30 seconds.
Power and connectivity complete your photo booth equipment checklist. You need a dedicated 15 to 20 Amp circuit, and your internet connection should deliver at least 10 Mbps upload speed for real-time sharing. A mobile hotspot as a backup is not optional. It is a necessity.
Pro Tip: Request a dedicated power circuit from your venue in writing before event day. Sharing a circuit with a DJ or catering equipment is the single most common cause of intermittent photo booth shutdowns.
How do you set up the photo booth step by step from arrival to ready-to-go?
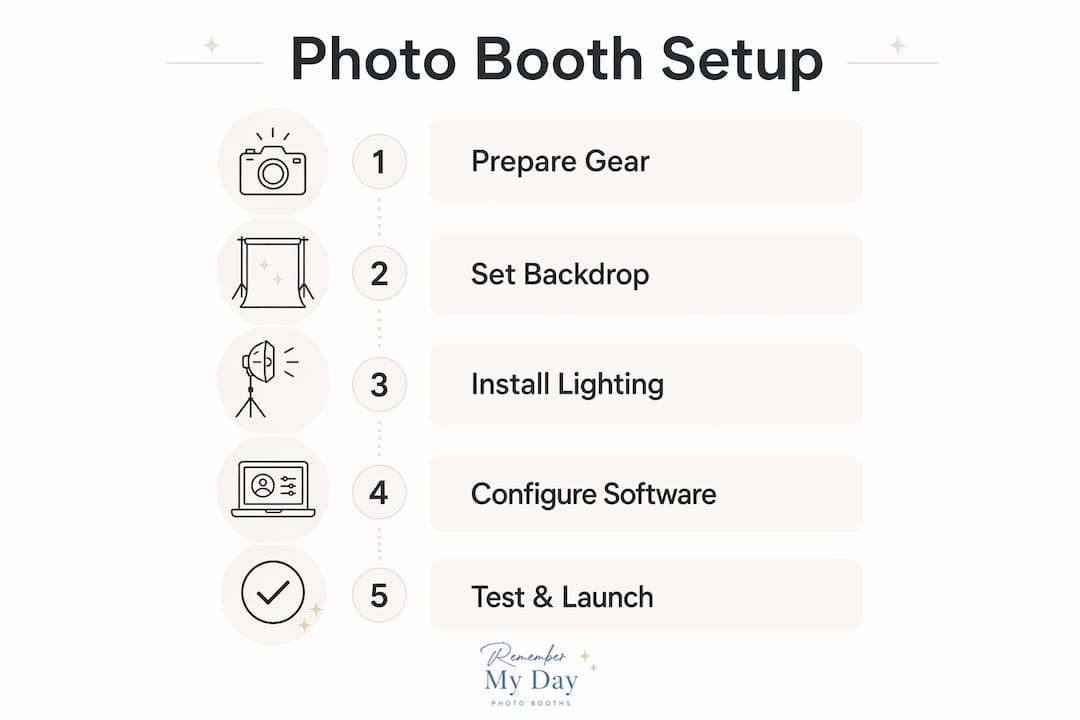
The industry term for this process is “stepwise photo booth installation,” and it follows a logical sequence that protects both your equipment and your guests. Rushing any stage creates problems that compound under the pressure of a live event.
-
Scout and confirm your location. Arrive at the venue at least two hours before guests. Identify a spot with natural foot traffic, good ambient light, and access to a dedicated power outlet. Avoid placing the booth near the bar, the DJ, or any high-traffic bottleneck. A spot near the entrance or adjacent to the main seating area works best for most events.
-
Assemble the frame and backdrop. Erect your backdrop stand on a flat, stable surface. Tension-rod stands are faster to assemble; pipe-and-drape systems are sturdier for outdoor or high-wind environments. Attach your backdrop fabric or panel and smooth out any wrinkles before securing it.
-
Position and stabilize your camera. Mount your camera on a tripod at chest height for standing guests, or at seated height if your booth is designed for seated use. Lock the tripod head firmly. A camera that shifts between shots destroys photo consistency.
-
Set up lighting. Place your ring light or softbox panels at a 45-degree angle to the subject, roughly 3 to 4 feet from where guests will stand. Power on the lights and check for hotspots or shadows on the backdrop before connecting your camera.
-
Connect power and internet. Run your power cables along the wall or under a cable ramp. Cable ramps or gaffer tape are non-negotiable safety measures to prevent trip hazards during events. Connect to your dedicated circuit and confirm your internet upload speed with a speed test app.
-
Install and configure your software. Open your photo booth software, load your custom overlay or branding template, and configure the sharing workflow. Set the countdown timer, test the print queue if you are using a printer, and confirm that the email or SMS delivery system is active.
-
Run a full test session. Take 10 to 15 test shots with different people standing in the booth. Check focus, exposure, and color balance. Send test photos via every sharing method you plan to use. Confirm that prints come out correctly aligned and that digital deliveries arrive within your target time.
-
Clear the guest interaction zone. Maintain 4 to 6 feet of clearance in front of the booth for guest interaction. Place a small prop table within arm’s reach of the shooting area so guests can grab items without stepping out of frame.
Pro Tip: Tape a printed “start here” instruction card to the prop table. Guests who know exactly what to do take better photos and move through faster, which keeps the line short and the energy high.
What are best practices for managing photo booths during an event?
Running the booth during the event is where your planning either pays off or falls apart. Photo booths enhance guest participation when paired with clear instructions, friendly attendants, and engaging props. The attendant role is not decorative. It is operational.
Your attendant should greet every group, suggest prop combinations, and physically demonstrate the start sequence for the first few guests of the evening. This removes hesitation and sets a fun, relaxed tone that spreads through the crowd organically. For mirror booths specifically, user intimidation without guidance is the primary failure point. An attendant who walks guests through the voice prompts turns a confusing experience into a memorable one.
During the event, monitor these operational priorities:
- Printing supplies. Check paper and ink levels every 45 minutes. Running out mid-event with a line of guests waiting is avoidable and embarrassing.
- Digital sharing queue. Confirm that photos are delivering successfully every 30 minutes. A backlogged queue often signals a connectivity issue that needs immediate attention.
- Prop organization. Reset the prop table after every group. Scattered props signal neglect and reduce the next group’s enthusiasm.
- Guest flow. If a line forms, set a soft two-minute time limit per group and communicate it warmly. “We want everyone to get their turn tonight!” works better than a sign.
Use a branded event hashtag displayed prominently near the booth. Post-event digital delivery through gallery platforms like Pic-Time, ShootProof, and Pixieset improves client satisfaction and extends the marketing life of every photo taken. When guests share their photos publicly with your hashtag, the event reaches people who were never in the room.
Inclusive photography fosters authentic, shareable moments when guests feel comfortable and unconstrained by forced poses. Train your attendant to offer options rather than directions. “You can stand, sit, or do whatever feels fun” produces more genuine expressions than “stand here and smile.”
Pro Tip: Place a small mirror near the prop table so guests can check their look before stepping in front of the camera. This tiny addition reduces retake requests and speeds up throughput significantly.
How can you customize photo booth setups to fit different event themes?
Customization is what separates a generic rental from a true memory-maker. The right booth type and theme can reinforce your event’s identity from the moment guests walk in. Here is how the main booth types compare across common event scenarios:
| Booth type | Best for | Price range | Key advantage |
|---|---|---|---|
| Enclosed booth | Weddings, private parties | $3,000 to $8,000 | Privacy and intimacy for small groups |
| Open-air kiosk | Corporate events, brand activations | $2,500 to $6,000 | Visibility and large group capacity |
| Mirror booth | Galas, upscale celebrations | $4,000 to $10,000 | Interactive, full-length experience |
| 360-degree platform | Product launches, large events | $8,000 to $20,000 | Cinematic slow-motion video output |
Beyond booth type, your photo booth customization options include digital overlays, themed props, and augmented reality filters. For a corporate product launch, a branded overlay with the company logo and event date on every photo turns each shared image into organic marketing content. For a wedding, a floral digital frame with the couple’s names and date creates a keepsake guests will print and display at home.
Augmented reality features, now available through platforms like Snappic and Simple Booth, let guests add animated elements to their photos in real time. AI-powered tools can reduce post-processing time from hours to minutes and enhance image quality automatically, which is especially useful for large events where hundreds of photos need consistent treatment.
For parties, the most popular photo booth ideas include neon sign backdrops, Hollywood glam setups with feather boas and oversized sunglasses, and retro vintage themes with film-style borders. Each theme works best when the props, backdrop, and digital overlay tell a single, cohesive visual story. You can explore creative party photo booth tips to find combinations that match your specific event vibe.
What common mistakes should you avoid for photo booth success?
Most photo booth failures trace back to decisions made before the event starts, not during it. Knowing the pitfalls in advance gives you the chance to plan around them.
- Wrong location choice. Placing a booth near a bar, exit, or catering station creates traffic jams that frustrate guests and reduce participation. Always choose a location with natural foot traffic but enough space for a small queue to form without blocking anything.
- Skipping the power check. A shared circuit with a DJ or catering equipment is a recipe for intermittent shutdowns. Confirm a dedicated circuit with your venue coordinator at least one week before the event.
- No guest instructions. A booth with no signage and no attendant gets ignored. Even a simple laminated card with three steps increases usage rates dramatically.
- Neglecting supplies mid-event. Paper and ink run out faster than you expect at a busy event. Bring 20% more supplies than you think you need and check levels regularly.
- Ignoring accessibility. A booth that only works for standing guests excludes wheelchair users and elderly attendees. Position your camera at an adjustable height and keep the interaction zone clear of obstacles.
“The best photo booth setup is the one guests never have to think about. If they have to figure it out, you’ve already lost them.”
Pro Tip: Bring a basic tech kit to every event: extra HDMI cables, a spare USB drive, gaffer tape, a portable power bank, and a printed copy of your software’s troubleshooting guide. You will use at least one of these items at every event.
Key takeaways
A successful event photo booth requires the right equipment, a precise installation sequence, and active management throughout the event to maximize guest participation and photo quality.
| Point | Details |
|---|---|
| Build your equipment checklist first | Camera, lighting, backdrop, software, and connectivity must all be confirmed before event day. |
| Follow the stepwise installation sequence | Scout location, assemble hardware, connect power, configure software, and run test shots in that order. |
| Assign a dedicated attendant | Human support is the single most effective way to increase booth usage and reduce technical issues. |
| Customize to your event type | Match booth type, props, and overlays to the event theme for a cohesive, shareable experience. |
| Plan for common failures | Bring backup supplies, confirm a dedicated power circuit, and test your internet speed on-site before guests arrive. |
What we’ve learned after setting up hundreds of photo booths
Here is something we see constantly: organizers spend weeks choosing the perfect backdrop and then plug the booth into a shared outlet next to the DJ. The backdrop looks stunning in the photos that never get taken because the booth keeps shutting down. Technology is only as reliable as the infrastructure supporting it.
We have also noticed that the events with the highest booth engagement are rarely the ones with the most expensive equipment. They are the ones with the most attentive attendants. A warm, enthusiastic person who invites guests over and makes the experience feel fun will outperform a $15,000 360-degree platform with no human support every single time. Personalized photo booth experiences work because they make guests feel seen, not just photographed.
The trend we are most excited about in 2026 is AI-assisted customization. Tools that automatically apply branded overlays, suggest prop combinations based on event theme, and deliver gallery-ready images without post-processing are genuinely changing what is possible for event organizers working without a dedicated photography team. But we always remind our clients: the technology should be invisible. If guests are thinking about the tech, something has gone wrong. The goal is for them to think about each other, laugh, and walk away with a photo they love.
Start with the basics. Get the location, power, and lighting right. Then layer in the creative elements. That sequence has never failed us.
— RMD
Ready to bring your event photo booth vision to life?
At Rmdphotobooths, we have helped thousands of event organizers across San Antonio create photo experiences their guests still talk about. Whether you are planning a wedding, a corporate activation, or a milestone birthday party, we offer everything from traditional photo booths to immersive 360-degree booth experiences and glamorous setups that make every guest feel like a star.

Our team handles the full stepwise photo booth installation, from equipment delivery and setup to on-site attendant support and post-event digital gallery delivery. You focus on your guests. We handle everything else. Book your booth today and let us help you create memories your guests will treasure forever.
FAQ
What is the minimum internet speed needed for a photo booth?
A dedicated upload speed of at least 10 Mbps is recommended for real-time photo sharing at events. Slower connections cause delivery delays that frustrate guests and reduce social sharing.
How early should you set up a photo booth before an event?
Arrive at least two hours before guests to allow time for assembly, software configuration, testing, and troubleshooting. Rushing setup is the most common cause of technical issues during the event.
What booth type works best for corporate events?
Open-air kiosks are the standard choice for corporate events because they accommodate large groups and maximize brand visibility through branded overlays and step-and-repeat backdrops.
How do you prevent a photo booth from causing crowd bottlenecks?
Place the booth away from bars, exits, and catering stations, and maintain 4 to 6 feet of clear space in front of the interaction zone. A dedicated attendant managing guest flow prevents lines from forming.
Can you run a photo booth without professional photography experience?
Yes, modern photo booth software like Darkroom Booth and Simple Booth HALO automates exposure, focus, and sharing, making it accessible for non-photographers. An on-site attendant and a thorough pre-event test session are still required for consistent results.
