TL;DR:
- A glam photo booth offers high-quality, editorial-style photos with studio lighting and real-time editing at weddings. Proper preparation, including skincare, wardrobe choices, and timely setup, is essential for stunning results. An experienced attendant guides posing and manages props to ensure a smooth and memorable guest experience.
A glam photo booth is defined as a professional portrait station that combines studio-grade lighting, real-time digital editing, and on-site posing guidance to produce editorial-quality photos at live events. These booths are the bridal photography upgrade most couples overlook until the day arrives. With the right glam photo booth bridal preparation tips, you can walk away with images that look like they belong on a magazine cover, not just a memory card. The difference between good photos and truly stunning ones comes down to preparation, placement, and a few styling decisions made well before the wedding day.
What bridal preparations optimize glam photo booth photos?
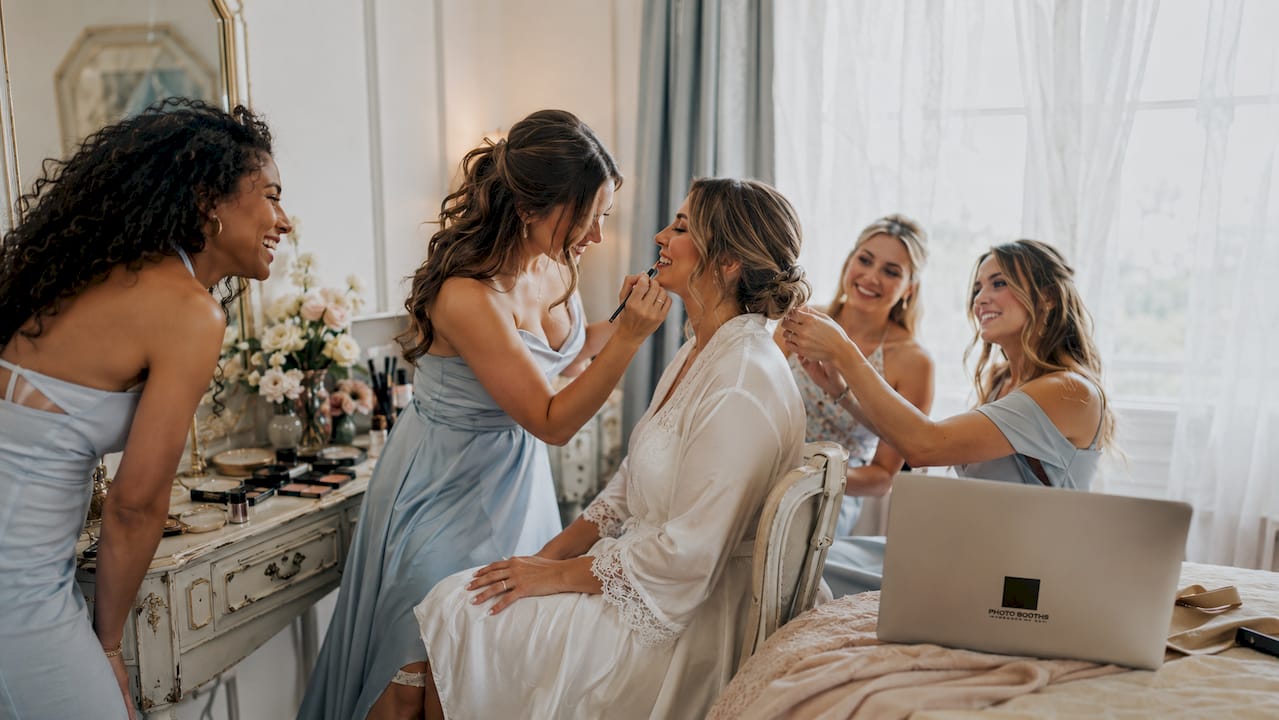
The most effective bridal prep for a glam booth starts with your skin, not your outfit. Hydrated, well-rested skin catches studio lighting beautifully. Start a consistent skincare routine at least four weeks before your wedding, focusing on moisturizing and gentle exfoliation to create an even base.
Makeup for a glam booth requires a heavier hand than everyday looks. Studio lighting is intense and flattens features, so contouring, defined brows, and bold lip color all read better on camera. Matte or satin finishes photograph more cleanly than shimmer-heavy products, which can create unwanted glare under direct lighting.
Wardrobe choices carry more weight than most brides expect. Busy patterns and all-white or all-black outfits cause contrast issues that even real-time editing cannot fully correct. Choose fabrics with texture, such as lace, velvet, or structured satin, and add statement jewelry to create visual depth in the frame.
- Skin prep: Moisturize daily for four weeks before the wedding. Avoid new skincare products in the final week to prevent reactions.
- Makeup: Use full-coverage foundation, defined contouring, and a bold lip. Avoid glitter or chunky shimmer near the eyes.
- Outfit color: Soft jewel tones, blush, champagne, and rich neutrals photograph beautifully under glam booth lighting.
- Fabric: Choose textured fabrics over flat solids. Lace, velvet, and structured satin add dimension to portraits.
- Jewelry: Statement earrings or a layered necklace create depth and draw the eye upward toward your face.
- Hair: Pushing hair off the face allows studio lighting to contour your jaw and neck, producing a more sculpted portrait.
Pro Tip: Rolling or cuffing your sleeves to expose your wrists gives the lighting a natural line to follow down your arm, which creates a longer, more elegant silhouette in the final photo.
How to plan and coordinate glam photo booth setup within your wedding timeline
Booth placement and timing are the two setup decisions that most directly affect photo quality. A glam booth requires a minimum footprint of 8×8 feet, with 9×9 or 10×10 feet preferred to allow comfortable guest flow. Confirm your venue has this space available before booking.
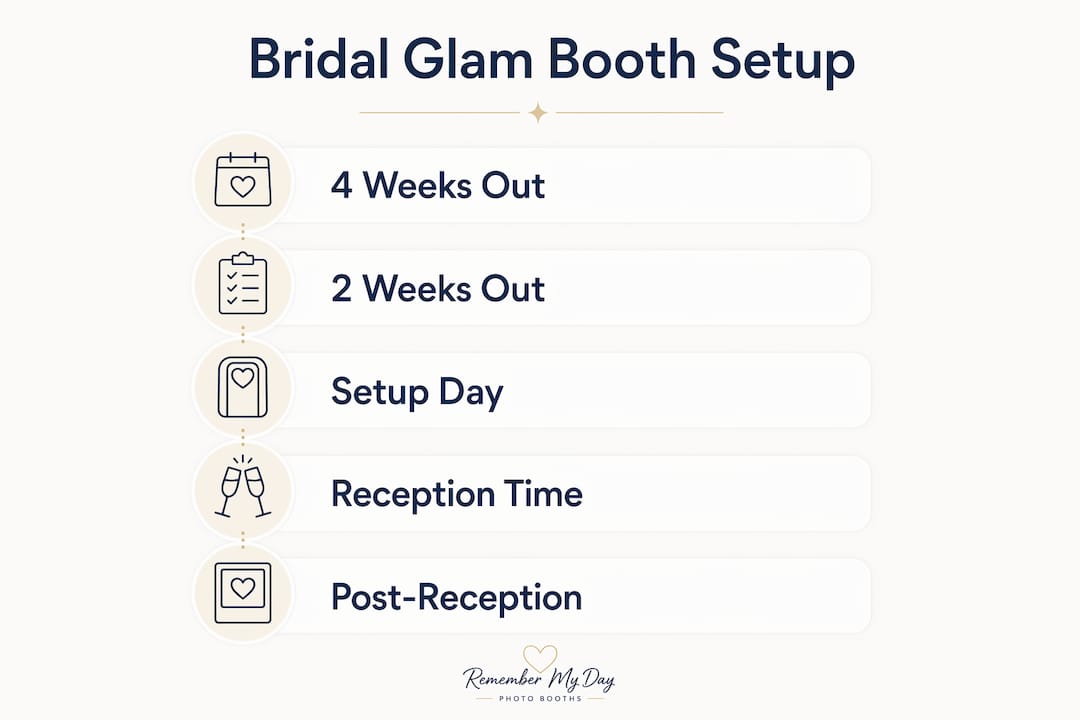
Power and connectivity are non-negotiable requirements. The booth needs a 15 or 20-amp outlet and at least 1 Mbps internet for instant photo sharing. Ask your venue coordinator about outlet locations during your site visit, not on the wedding day.
Setup requires 1 to 1.5 hours before the event starts to calibrate lighting and test connectivity. Build this window into your venue load-in schedule and confirm it with your venue manager in advance. A rushed setup produces inconsistent lighting and missed calibration steps.
Here is a practical coordination checklist to keep your timeline on track:
- Confirm booth dimensions with your venue at least 30 days before the wedding.
- Reserve a dedicated power outlet near the booth location. Extension cords reduce power reliability.
- Schedule vendor load-in at least 90 minutes before guests arrive to allow full setup and testing.
- Designate a point of contact at the venue who can assist the booth team on arrival.
- Coordinate booth placement away from the DJ or band speakers to prevent vibration blur.
| Setup element | Requirement |
|---|---|
| Minimum floor space | 8×8 feet (10×10 preferred) |
| Power supply | 15 or 20-amp dedicated outlet |
| Internet speed | 1 Mbps minimum for instant sharing |
| Setup window | 1 to 1.5 hours before event start |
| Attendant role | On-site editor, posing guide, and prop manager |
Coordinating your wedding photo booth workflow with your overall event schedule prevents bottlenecks and keeps guests moving smoothly through the experience. A well-placed, properly powered booth runs itself once the attendant is in position.
What are the best posing and prop tips for brides at the glam booth?
Posing is where most brides feel uncertain, and it is also where a great attendant makes the biggest difference. High-end glam booths feature on-site editors and posing guidance coordinated by a professional team, so you never have to figure out angles on your own. Trust the attendant’s direction and resist the urge to default to a stiff, straight-on stance.
The most flattering glam booth poses share three qualities: a slight body angle, a relaxed jaw, and a lifted chin. Turning your body 30 to 45 degrees from the camera slims the frame. Relaxing your jaw and slightly parting your lips softens the expression. Lifting your chin just a fraction prevents shadows from pooling under the eyes.
- Solo bride shots: Angle your body slightly, hold your bouquet at hip level, and look just past the camera lens for a natural, confident expression.
- Bridal party group shots: Stagger heights by having some guests sit or kneel. Avoid flat rows, which flatten the image.
- Props: Choose props that frame the face rather than cover it. Fans, floral hoops, and signs work well. Avoid full-face masks.
- Prop rotation: Attendants rotate props every 60–90 minutes to keep the experience fresh and prevent guests from repeating the same shots.
- Bridal party coordination: Brief your bridesmaids before the reception. A quick two-minute posing chat prevents hesitation and speeds up the line.
Pro Tip: Ask your booth attendant for a “test shot” before the reception begins. Use it to check your makeup, hair, and outfit under the actual booth lighting while there is still time to make adjustments.
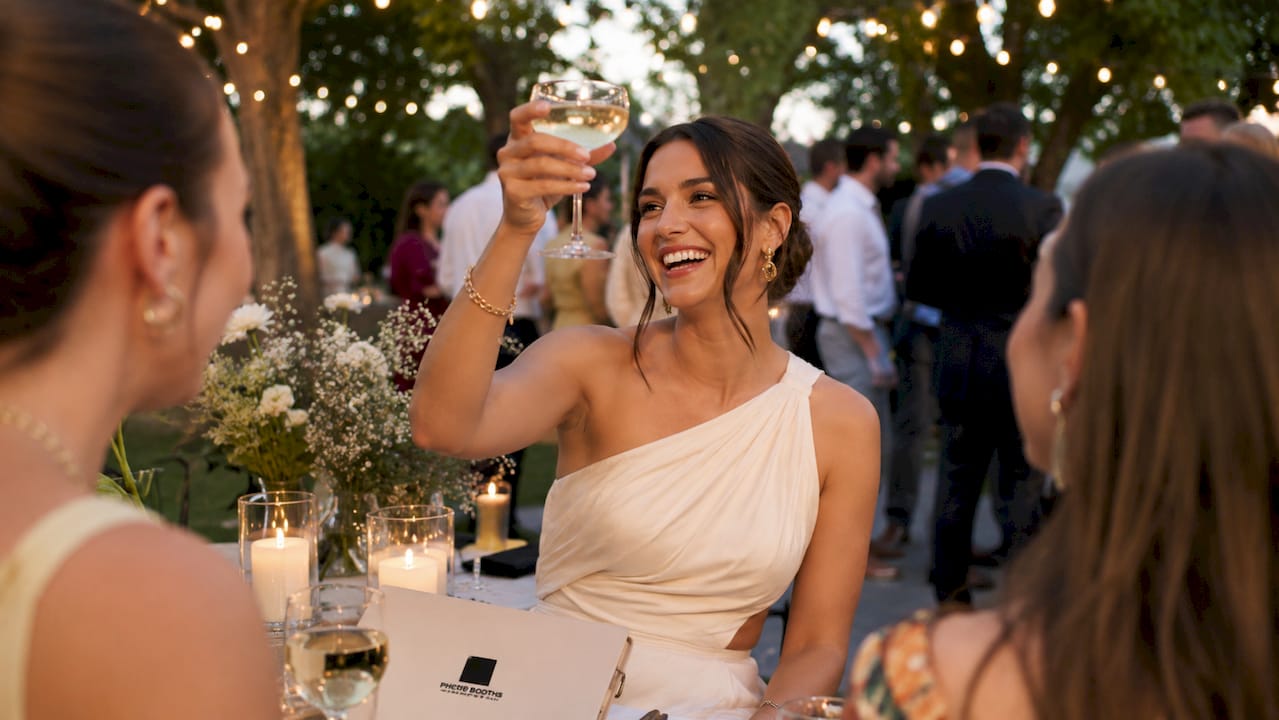
The bridal party photo booth posing tips that consistently produce the best results focus on energy and connection, not perfection. Laughing, leaning in, and genuine interaction between the bride and her party create photos that feel alive rather than posed.
Common mistakes to avoid for a flawless glam photo booth experience
The most damaging mistake is poor booth placement. Placing the booth near loud bass speakers causes vibration that blurs the camera sensor mid-shot. Direct venue spotlights create harsh shadows that real-time editing cannot fully remove. Position the booth in a quieter corner of the reception space with neutral ambient light.
Outfit choices cause more photo problems than most brides realize. All-white gowns can overexpose under studio lighting, washing out detail in the fabric. All-black outfits absorb light and lose texture. Both extremes create contrast issues that reduce the editorial quality of the final image.
- Skipping the test shot: Always do a test shot before guests arrive. It catches lighting and makeup issues while there is still time to fix them.
- Ignoring venue lighting conflicts: Harsh overhead spotlights directly above the booth create unflattering top-down shadows. Reposition the booth or ask the venue to dim nearby fixtures.
- Wearing all-white or all-black: Both extremes create exposure problems. Opt for ivory, champagne, or a colored accent piece instead.
- Insufficient setup time: Rushing the setup skips calibration steps. The result is inconsistent lighting across the night.
- Prop clutter: Too many props at once overwhelm guests and slow down the line. Keep three to five props available at any time and rotate them regularly.
A well-prepared venue setup eliminates most of these issues before a single guest steps in front of the camera. Planning ahead is the single most effective thing you can do for your glam booth experience.
Key takeaways
Glam photo booth bridal preparation requires coordinating skincare, wardrobe, booth placement, and posing guidance together to produce editorial-quality wedding portraits.
| Point | Details |
|---|---|
| Start skincare early | Begin a hydrating skincare routine four weeks before the wedding for camera-ready skin. |
| Choose the right outfit | Avoid all-white and all-black; textured fabrics and statement jewelry create depth in photos. |
| Plan booth placement carefully | Reserve 8×8 to 10×10 feet, a dedicated power outlet, and a location away from speakers. |
| Allow 1.5 hours for setup | Build a 90-minute load-in window into your venue timeline to allow full calibration. |
| Trust your booth attendant | A professional attendant directs posing, rotates props, and manages guest flow throughout the event. |
What we have learned after hundreds of wedding glam booth setups
After working with brides across hundreds of San Antonio weddings, the pattern we see most often is this: the brides who get the most stunning glam booth photos are not necessarily the ones with the most elaborate styling. They are the ones who prepared intentionally and trusted the process.
The detail that surprises most brides is how much sleeve and hair positioning matters. We have seen beautifully styled brides step in front of the camera and lose half the impact of their look simply because their hair fell forward and covered their neck. One small adjustment, pushing the hair back and rolling a sleeve, changes the entire portrait.
We also believe strongly in the value of a live band or curated music near the reception space. When guests feel the energy of the room, they bring that energy to the booth. The best glam booth photos come from guests who are genuinely having fun, not guests who feel like they are posing for a formal portrait.
The advice we give every bride is simple: book a vendor who provides an on-site attendant and real-time editing, prepare your skin and wardrobe with the lighting in mind, and give the setup team the time and space they need. Do those three things, and the photos will take care of themselves.
— RMD
Rmdphotobooths glam booth rentals for your wedding day
At Rmdphotobooths, we have built our glam booth experience around one goal: giving every bride editorial-quality portraits she will treasure forever. Our professional attendants handle posing guidance, real-time editing, and prop management from the first guest to the last dance.

We offer customizable wedding packages that include day-of coordination support, so you never have to worry about setup logistics on your wedding day. With over 1,000 five-star reviews and deep experience across San Antonio weddings, we know exactly how to make your celebration truly shine. Ready to create those “wow” moments? Book your date and let us bring your vision to life.
FAQ
What is a glam photo booth at a wedding?
A glam photo booth is a professional portrait station that uses studio-grade lighting and real-time digital editing to produce high-quality, editorial-style photos at live events. It differs from a standard photo booth by including an on-site attendant who directs posing and edits images instantly.
How much does a glam photo booth rental cost for a wedding?
Professional glam booth rentals cost between $800 and $2,500 for a four-hour service, which includes setup, an on-site attendant, and real-time editing. DIY alternatives range from $150 to $800 but do not include professional lighting or editing support.
What should a bride wear to a glam photo booth?
Brides should choose textured fabrics in soft jewel tones, blush, or champagne and add statement jewelry for depth. Avoid all-white or all-black outfits, as both create contrast issues under studio lighting.
How much space does a glam photo booth need at a wedding venue?
A glam booth requires a minimum of 8×8 feet, with 10×10 feet preferred for comfortable guest flow. The booth also needs a dedicated 15 or 20-amp power outlet and at least 1 Mbps internet access.
How early should the glam photo booth be set up before the reception?
Setup requires 1 to 1.5 hours before the event starts to calibrate lighting and test connectivity. Coordinate this window with your venue manager during the planning process, not on the wedding day.
