TL;DR:
- A well-designed photo booth workflow ensures guests enjoy quick, seamless, and memorable photo experiences at events.
- Proper planning, equipment setup, and pre-event testing are crucial to prevent breakdowns and enhance guest satisfaction.
Picture this: your guests are laughing, striking poses, and walking away with a printed keepsake in their hands within seconds. The line is moving, the photos look stunning, and nobody is standing around confused. That is what a well-planned photo booth workflow delivers. But when the workflow breaks down, even the most beautiful booth becomes a source of frustration, blank screens, and unhappy guests. We put together this guide specifically for San Antonio event planners and hosts who want to run their booth setup like a seasoned pro and create those “wow” moments that guests will treasure forever.
Table of Contents
- What you’ll need: Tools, materials, and must-haves
- Step-by-step private party photo booth workflow
- Optimizing lighting and photo quality for party success
- Enhancing guest experience and workflow efficiency
- Our perspective: What most guides miss about photo booth workflows
- Level up your next San Antonio party with a pro photo booth
- Frequently asked questions
Key Takeaways
| Point | Details |
|---|---|
| Preparation is key | Gather the right tools and test everything before your event starts. |
| Step-by-step workflow | A repeatable process ensures the booth runs smoothly and guests stay happy. |
| Lighting boosts quality | Thoughtful lighting and camera setup make photos pop and memories last. |
| Self-serve features | QR codes and app sharing keep lines moving and empower your guests. |
| Pro support available | Expert help and local rentals simplify your private party and guarantee results. |
What you’ll need: Tools, materials, and must-haves
Now that you know why workflow matters, let’s make sure you’re equipped to run your booth like a pro.
Getting your gear list right is the foundation of everything. Skipping even one item can bring the entire operation to a halt mid-party, and nobody wants to be troubleshooting printer cables while guests are waiting in line.
Here is what a solid photo booth setup requires:
Core equipment:
- A DSLR or mirrorless camera with a reliable trigger
- A dye-sublimation printer for fast, high-quality prints
- A tablet or iPad to run your booth app and display a live preview
- A sturdy backdrop that matches your party’s theme or color palette
- Continuous lighting (at minimum a key light and a fill light)
Must-have software and apps:
- A dedicated booth app that handles the shoot, process, and output cycle
- A digital sharing platform so guests can get their photos via text, email, or QR code
- An editing or overlay app to add custom branding or party themes
- Guided Access (on iPad) or a kiosk-mode solution to lock the device to one app
Accessories and backup items:
- Fun props (signs, hats, frames, glasses) to encourage guest participation
- Extension cables and a power strip with surge protection
- A backup battery pack or second power source
- Clear signage explaining how to use the booth
Understanding the photo booth setup process helps you think through every step before you arrive at the venue. And thinking carefully about photo booth placement at your specific venue will save you from tight corners, poor lighting angles, and traffic bottlenecks.
Now, one of the biggest decisions hosts face is whether to go DIY or rent professionally. Here is a quick side-by-side comparison to help you decide:
| Factor | DIY setup | Professional rental |
|---|---|---|
| Upfront cost | Lower, but equipment adds up | Included in rental package |
| Setup time | 2 to 3 hours minimum | Handled by the provider |
| Technical support | You’re on your own | On-call support available |
| Print quality | Varies by equipment | Consistent, lab-quality output |
| Software licensing | Ongoing subscription cost | Included in rental |
| Customization | Limited by your skills | Theme, overlay, and branding options |
| Reliability | Depends on your testing | Proven, event-tested systems |
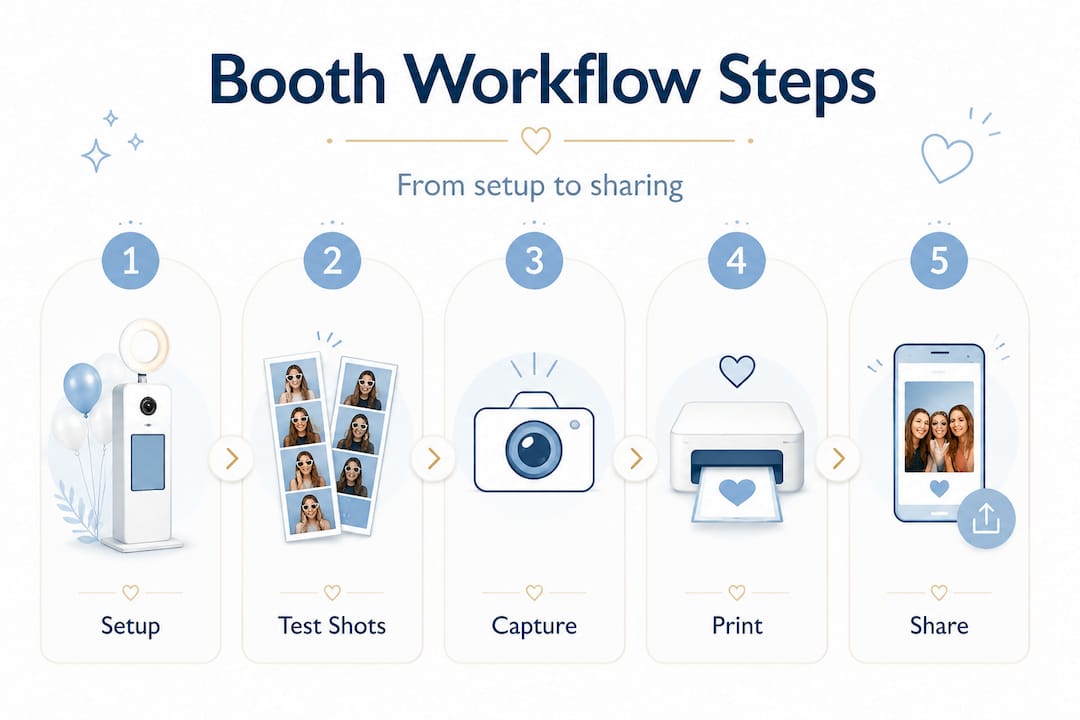
A solid photo booth workflow follows a repeatable loop: pre-event setup, test shots, and then the live cycle covering shoot, process and edit, and print or upload and share, all while managing connectivity and offline queuing. Knowing this loop in advance helps you build your gear list around it, not the other way around.
Step-by-step private party photo booth workflow
With everything gathered, here’s the precise workflow to keep your event running on rails.
Running a photo booth without a documented workflow is like cooking a big dinner without a recipe. You might get through it, but something will go sideways. Here is the sequence we recommend for every private party:
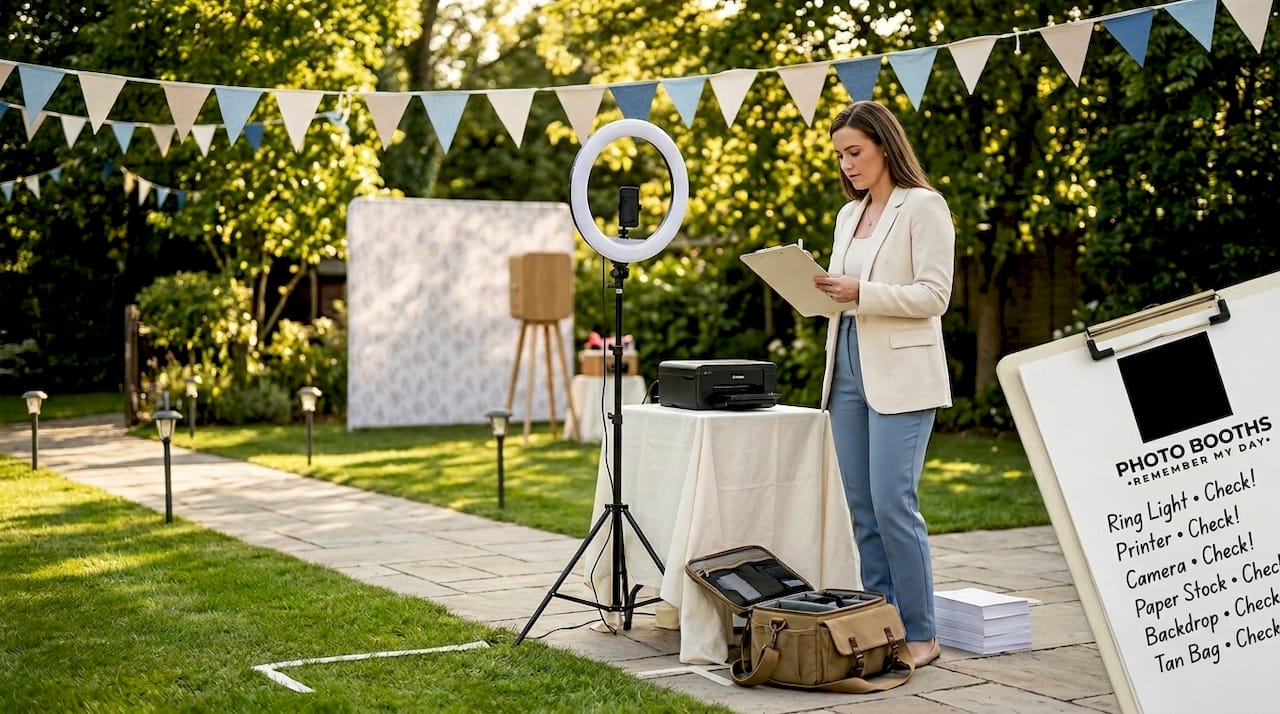
- Arrive at least 90 minutes early. Give yourself time to assess the space, find the power outlets, and test the WiFi signal before anything else happens.
- Set up the backdrop, lighting, and camera. Position your camera first at eye level, then arrange the lights before you power anything on.
- Connect your tablet or iPad and open the booth app. Check that all permissions are enabled (camera access, storage, printing, and upload permissions).
- Run test shots. Take three to five test photos and run them through the full cycle: capture, process, print, and share. This catches problems before guests arrive.
- Check your upload queue and connectivity. If you are relying on venue WiFi, test it under load. If signal is weak, switch to a mobile hotspot.
- Enable Guided Access or kiosk mode. Lock the device so guests interact only with the booth app.
- Brief any helpers or attendants. A two-minute walkthrough is all it takes to get someone else up to speed on the workflow.
- Open the booth to guests. Place signage, set out props, and let the fun begin.
- Monitor the workflow actively. Check the upload queue, printer paper level, and battery status every 30 minutes.
- Tear down after the event. Collect printed samples, back up files, and do a full review of the upload queue before leaving.
Here is a quick reference table showing the key stages and what to verify at each one:
| Stage | Key action | What to verify |
|---|---|---|
| Arrival and setup | Position gear and connect power | All equipment powered and functional |
| Pre-guest testing | Run full shoot-to-print cycle | Photos process cleanly, printer fires |
| Permissions check | Enable all app permissions | Camera, storage, and sharing confirmed |
| Kiosk lockdown | Activate Guided Access | Device locked to booth app only |
| Live operation | Monitor every 30 minutes | Queue health, paper, battery status |
| Post-event | Back up and queue check | All photos uploaded and accounted for |
Test-mode and permissions checks are critical parts of the workflow so the booth cannot get stuck mid-party. Camera access, upload queue health, and iPad Guided Access behavior all need to be confirmed before a single guest steps in front of the lens. And for guest experience, successful workflows manage instructions, keep lines moving, and make sure the booth is fully tested and ready before anyone arrives.
You can explore what a complete event photo booth workflow looks like in practice, and see how personalized photo booth experiences take a great workflow and give it real emotional meaning for your guests.
Pro Tip: Enable Guided Access on an iPad before the party starts. Go to Settings, then Accessibility, then Guided Access, and set a passcode. This prevents curious guests from accidentally closing the app or browsing your photos library.
Optimizing lighting and photo quality for party success
Once your workflow is running, optimizing lighting ensures every print or share is worth keeping.
Great lighting is the single biggest factor separating average booth photos from ones guests frame and hang on their wall. And it does not have to be complicated. You just need to understand the role each light plays.
Lighting methodology is a core part of a professional workflow: position the camera first, then place lights as key and fill, and optionally add edge or backlight, so groups and faces are evenly lit and separated from the backdrop. Here is what each light in the setup actually does:
- Key light: The main light source positioned to the side of the camera at a 45-degree angle. It shapes the subject and creates depth.
- Fill light: Placed on the opposite side to reduce harsh shadows from the key light. Keeps faces bright and friendly.
- Edge or rim light: Placed behind the subject. Adds a subtle glow that separates the person from the backdrop and creates a polished, professional look.
- Backlight or backdrop light: Illuminates the backdrop itself so it reads as vibrant and even in photos rather than muddy or flat.
“Position the camera at eye level first. Then build your lighting around that position. Lighting that works perfectly for the camera angle is always more important than lighting that looks good to the naked eye.”
When you are working in a low-light venue or a tight space, bring portable continuous lights on adjustable stands. These give you the freedom to reposition quickly without running extra cables across the room. Speaking of cables, always tape them down along walls or under mats to keep your setup safe and tidy.
For additional ideas on making your photos shine, our guide to creative party photo booth tips is packed with inspiration for 2026 events. And if you need a refresher on how the setup process all fits together, revisit our breakdown of the photo booth setup process to make sure nothing gets missed.
Pro Tip: Tape down every single cord in your booth area before guests arrive. A trip hazard mid-party is not just dangerous, it can knock over your entire setup. A roll of gaffer tape is one of the best investments in your booth kit.
Enhancing guest experience and workflow efficiency
A polished workflow isn’t just behind-the-scenes — it shapes the energy and flow guests feel at your party.
You can have the best camera, the sharpest lighting, and the fastest printer on the market, and still deliver a frustrating experience if the guest-facing side of your workflow is unclear. Here is how we think about making guests feel comfortable and excited from the moment they step up to the booth.
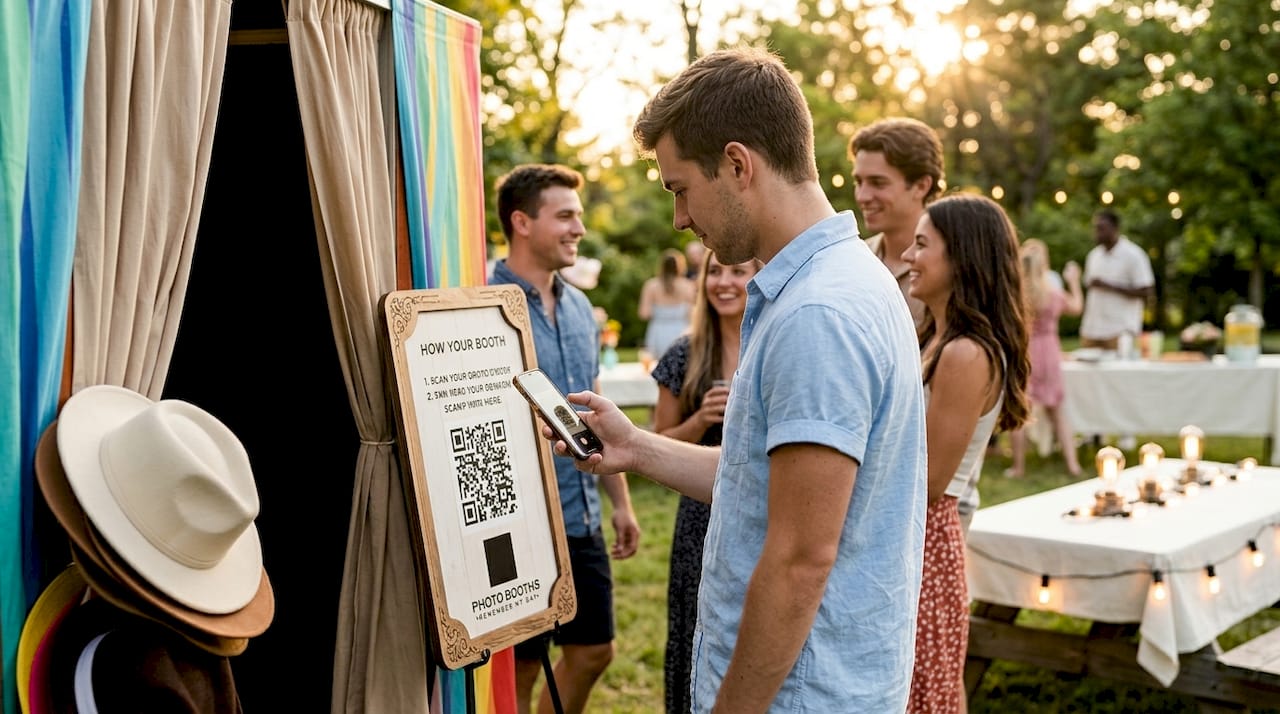
Start with clear instructions. A simple foam-core sign posted next to the booth, showing three steps with icons, eliminates confusion. Most guests have never used your specific booth before. Make it obvious.
Keep the line moving. Set your shoot cycle to a countdown that gives guests just enough time without lingering too long. A 3 to 5 second countdown works well for most groups.
Use QR codes and app-based sharing. Reducing workflow friction with QR-based or app-based digital sharing lets guests self-serve their uploads while you focus on readiness and handling any exceptions. Guests love getting their photo instantly on their phone. It extends the magic of the booth far beyond the party.
Decide early whether you need an attendant. For smaller gatherings under 50 guests, a well-designed self-serve workflow can run smoothly without constant supervision. For larger parties, having someone present to reset the booth, refill paper, and guide guests keeps everything moving.
Check out our tips on photo booth etiquette to help guests get the most out of their experience. And if you’re looking for inspiration on creating a truly memorable private event experience, it helps to see how other San Antonio venues think about guest flow and atmosphere.
Here is a quick checklist for the guest-facing side of your workflow:
- Bold, easy-to-read instruction signage posted at eye level
- Props arranged neatly and refreshed regularly throughout the event
- QR code or sharing card available for instant digital delivery
- Countdown timer clearly visible in the booth preview screen
- Backup kit within arm’s reach (cables, paper, batteries, and a printed troubleshooting card)
Pro Tip: Bring a small, labeled backup kit to every event. Include a spare HDMI cable, extra printer paper, a charged backup battery, and a one-page troubleshooting cheat sheet. This kit has saved countless parties from last-minute panic.
Our perspective: What most guides miss about photo booth workflows
Most event planning articles spend a lot of time talking about props, print designs, and backdrop themes. Those things matter. But in our experience running hundreds of events across San Antonio, the thing that actually determines whether a party is remembered fondly is the reliability and smoothness of the workflow underneath all that fun.
We have seen gorgeous, expensive setups fall apart because nobody tested the printer before guests arrived. We have also seen simple, no-frills booths become the highlight of a wedding reception simply because everything worked flawlessly and guests never had to wait more than 30 seconds.
The uncomfortable truth is that guests do not remember the specific overlay design on their print. They remember whether the booth was fun and easy to use. They remember the feeling of getting their photo quickly and laughing with their friends. That experience is 100% driven by the workflow, not the aesthetics.
For San Antonio hosts specifically, there are local logistics worth taking seriously. Many venues here have inconsistent WiFi, especially in older buildings or outdoor pavilion spaces. Planning for offline queuing is not optional, it is essential. Knowing your venue’s power situation in advance, including whether you need an extension cord or a separate circuit, is the kind of preparation that separates smooth events from chaotic ones.
Building in redundancy is what transforms a stressful evening into a joyful one. Our creative booth tips always tie back to this core principle: the best guest experience starts with a workflow that does not require you to panic.
Level up your next San Antonio party with a pro photo booth
Ready to supercharge your workflow and guest memories? Here’s how top San Antonio hosts take it up a notch.
Handling every piece of this yourself is completely possible, but it takes time, testing, and a lot of troubleshooting experience. When you book a professional photo booth through us, all of that heavy lifting is already done. We show up early, set everything up, test every single feature, and stay ready to handle anything that comes up so you can enjoy your own party.

We offer a wide range of memorable event experiences including 360° booths, glam booths, AI-powered portrait options, and classic traditional booth rentals that bring the fun to any crowd. Every package comes with professional setup, custom overlays, and instant digital sharing. With over 1,000 five-star reviews behind us, we know what it takes to make a San Antonio party truly shine. When you’re ready to make your celebration unforgettable, book your photo booth and let us bring your vision to life.
Frequently asked questions
How early should I set up my photo booth before a private party?
Plan to set up at least one hour before guests arrive so you can test every feature and fix any issues. Arriving early and testing every trigger, rehearsing with the host, and using visible instructions are key steps for a great guest experience.
What do I do if the booth loses internet connection during the event?
Most apps support offline queuing, so photos will upload once connectivity returns — just check the queue after the event. Offline queuing and upload queue health checks are built into a solid pre-event workflow.
Can I run a private party photo booth without an attendant?
Yes, with the right workflow and app-based guest instructions, events can run smoothly without a full-time operator. An app-driven guest walkthrough means an attendant may not be required for smaller gatherings.
How do I prevent guests from tampering with the booth device?
Enable Guided Access on an iPad or kiosk mode so only the booth app runs during the party. Enabling Guided Access is part of a standard pre-event preflight checklist to prevent participants from leaving the booth interface.
What’s the most common mistake with private party photo booth workflows?
Not testing the equipment and workflow fully before guests arrive leads to delays and poor experiences. Testing every trigger and running pre-event checklists are the single most important habits you can build into your setup routine.
