TL;DR:
- Effective photo booth setup begins with measuring space, ensuring dedicated power, and securing cables to prevent hazards. Proper planning, testing, and strategic placement maximize guest engagement and event safety, leading to a seamless experience. Thorough rehearsals and working with reliable support minimize issues, ensuring memorable celebrations.
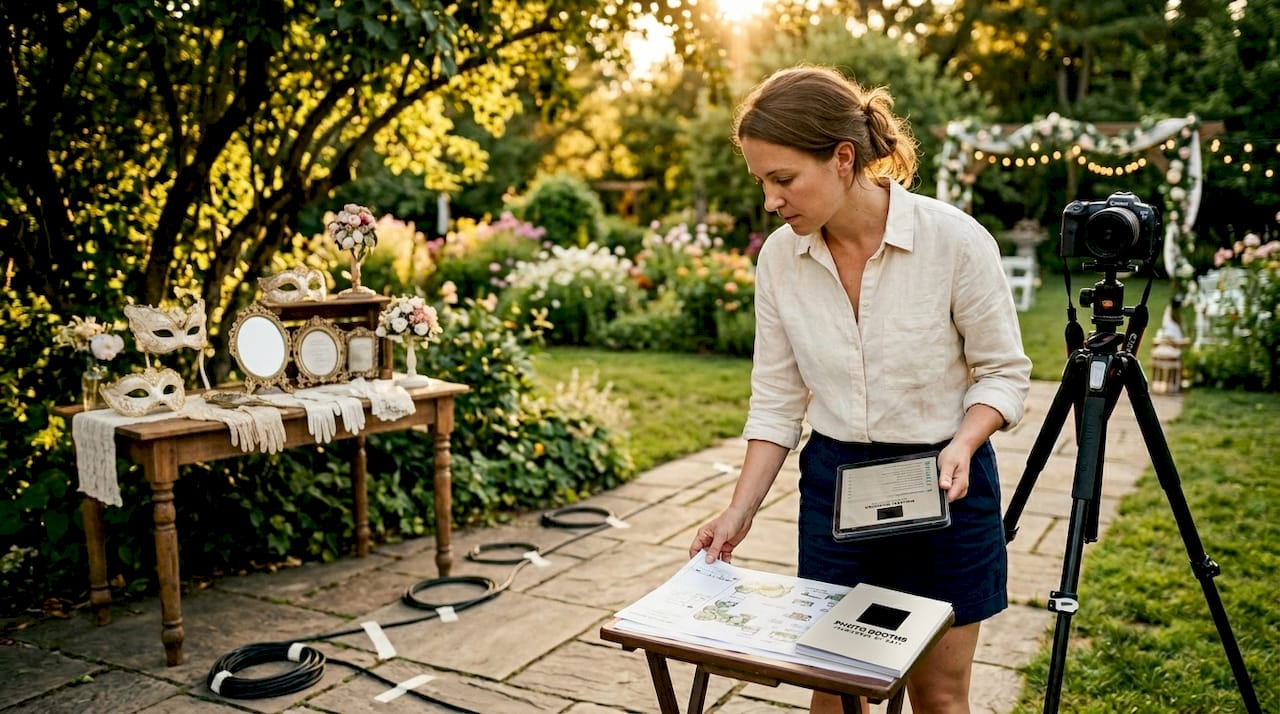
Venue photo booth preparation is the process of coordinating space, power, equipment, and safety protocols to deliver a smooth, guest-ready experience from the moment doors open. Skip one step in this photo booth preparation guide and you risk tangled cables, frozen touchscreens, or a booth tucked in a corner nobody visits. The good news is that following clear venue photo booth preparation steps turns what feels like a logistical puzzle into a repeatable, confidence-building process. Whether you are organizing a San Antonio wedding, a corporate gala, or a private birthday bash, the framework below covers everything from footprint planning to guest engagement.
What essential tools and space requirements must be considered?
Photo booth setup begins with measuring your venue space before a single piece of equipment leaves the truck. A magic mirror photo booth, one of the most popular modern setups, requires roughly 8×8 feet of floor space plus 4 to 6 feet of clear guest distance in front of the mirror. That means you need a minimum 8×14 foot zone before accounting for a prop table or signage. Underestimating this is the single most common mistake first-time organizers make.
Power is the next non-negotiable. Most photo booths draw between 500 and 1,200 watts, so a dedicated electrical outlet on its own circuit prevents tripped breakers mid-event. Never share a circuit with DJ equipment, catering warmers, or lighting rigs. Confirm outlet placement with the venue manager at least one week before the event so you can plan your cable route without surprises.
Flooring and lighting conditions matter more than most organizers expect. Choose a level, dry surface to keep the booth stable and prevent camera tilt. Natural light from windows creates harsh glare on touchscreens and reflective backdrops, so position the booth perpendicular to windows rather than facing them directly. Most magic mirror units have integrated illumination, which reduces the need for external lighting, but open-air booths still benefit from a softbox or ring light positioned at a 45-degree angle.
| Booth type | Minimum floor space | Power draw | Key placement note |
|---|---|---|---|
| Magic mirror | 8×8 ft + 4-6 ft guest zone | 500-800W | Avoid direct window glare |
| Traditional enclosed | 6×6 ft | 400-600W | Needs privacy from foot traffic |
| 360° spin booth | 10×10 ft open circle | 600-1,000W | Requires clear perimeter for safety |
| Open-air/glam booth | 8×10 ft with backdrop | 400-700W | Backdrop stand needs wall anchor or weight bags |
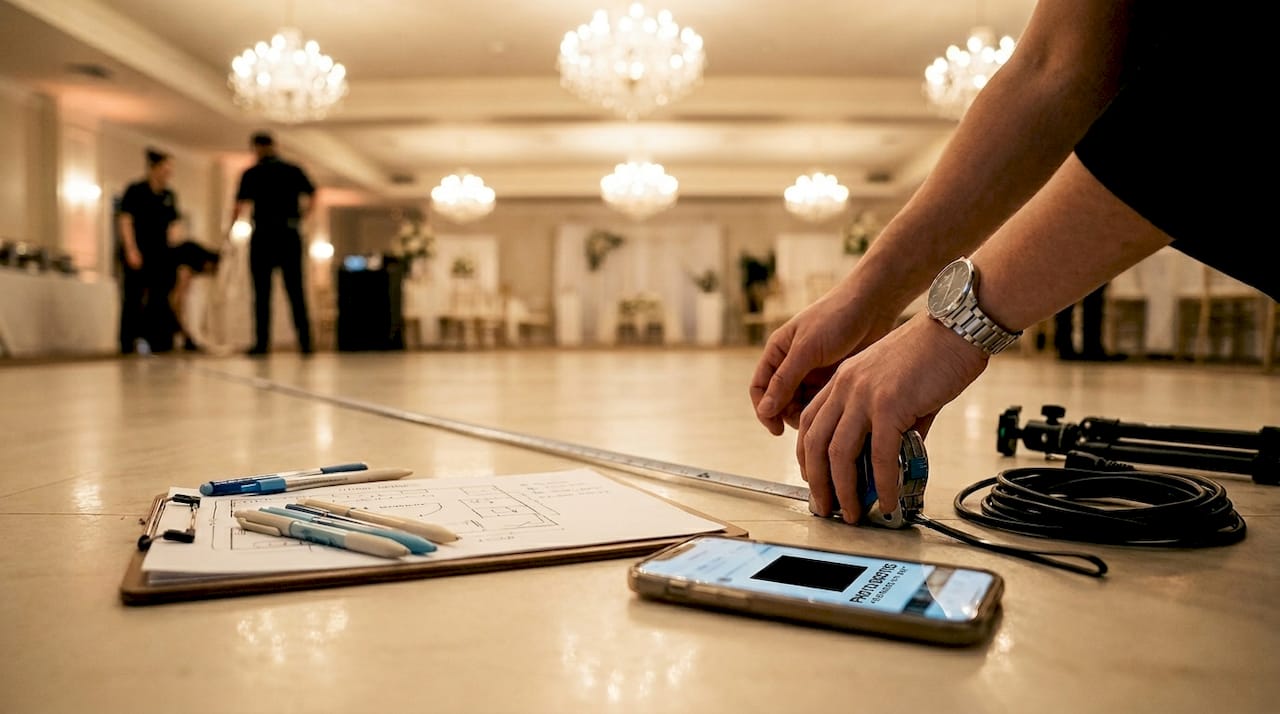
Pro Tip: Walk the venue floor with a tape measure and a phone camera before load-in day. Photograph every outlet, doorway width, and ceiling height. This 20-minute scouting visit eliminates 90% of day-of surprises.
What are the step-by-step setup procedures for a venue photo booth?
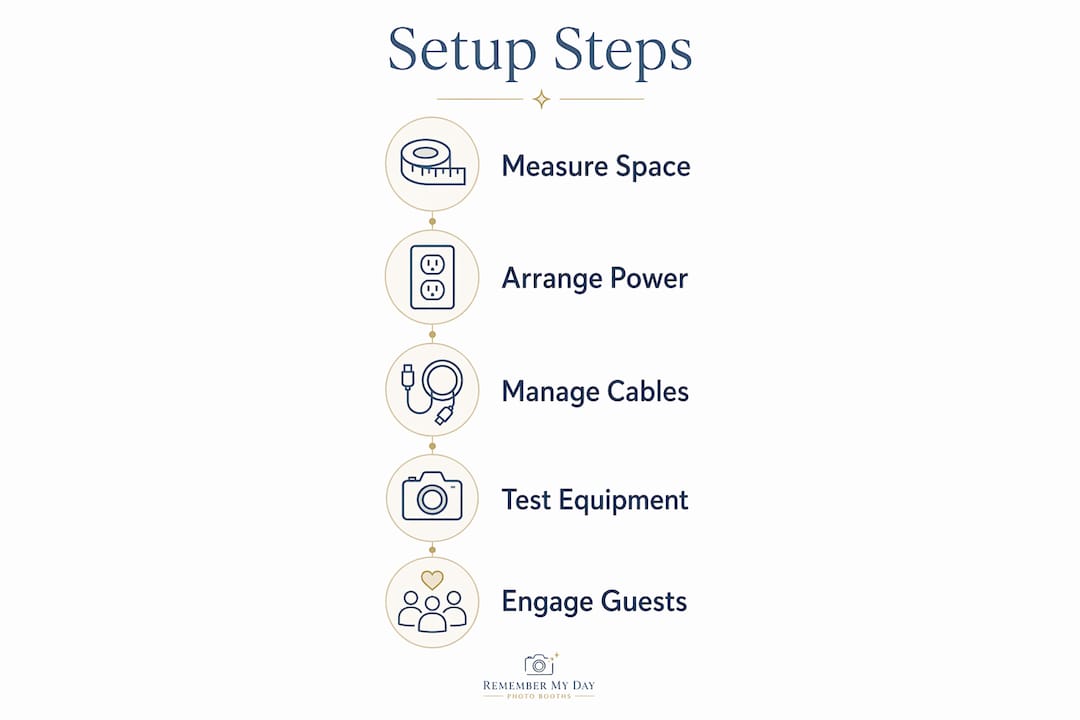
A structured walkthrough is the backbone of any solid photo booth checklist for events. Timed buffer zones at each stage prevent rushed installations and give you space to test every feature before guests arrive. Here is the sequence we recommend for a complete photo booth setup process:
- Unload and stage equipment at the venue entrance. Group components by function: booth body, backdrop stand, lighting, cables, and props. This prevents frantic searching during assembly.
- Position the booth body on the pre-measured spot. Use a level app on your phone to confirm the unit sits flat. Even a slight tilt affects camera angle and print quality.
- Install the backdrop. Tension rod stands work well for lightweight fabric, while heavy velvet or sequin backdrops need a crossbar stand with sandbag weights at the base. Wrinkles in fabric backdrops show up in every photo, so steam or iron before hanging.
- Route and tape all cables. Gaffer tape secures cables every 12 to 18 inches along the floor path. Its matte finish prevents glare and it removes cleanly without damaging venue floors. Never use duct tape as a substitute.
- Configure camera and software settings. Set white balance, exposure, and framing guides. For magic mirror units, test the touchscreen interface through a full guest cycle including photo capture, filter selection, and print or share confirmation.
- Test print and digital sharing functions. Run at least three full print cycles and one digital share to a test email or phone number. Confirm paper and ink levels are sufficient for your expected guest count plus a 20% buffer.
- Do a full guest simulation. Walk through the booth as a guest would, from approaching the unit to receiving a print or digital file.
Common setup mistakes to avoid:
- Placing the booth directly under air conditioning vents, which causes paper jams in thermal printers
- Forgetting to lock backdrop stand leg joints, which leads to mid-event collapses
- Using extension cords without surge protection
- Skipping a test print after repositioning the booth, since moving the unit can shift paper alignment
- Leaving prop tables unattended before the event, which results in missing or scattered items
Pro Tip: Simulate the full guest workflow with a colleague acting as a first-time user. Ask them to use the booth without any coaching. Every point of confusion they hit is a problem your guests will also hit.
How can event organizers handle safety and technical troubleshooting?
Safety during a live event starts with cable management. Gaffer tape’s strong hold and damage-free removal make it the industry standard for securing floor cables at venues. Tape every cable run from the booth to the outlet, covering the full length with overlapping strips every 12 to 18 inches. Use bright-colored tape or a cable cover ramp in high-traffic crossing zones so guests see the hazard clearly.
Technical problems at events are most often caused by connectivity issues, power interruptions, or user error rather than hardware failure. That is reassuring because all three are fixable on the spot. Keep a mobile hotspot charged and ready in case venue Wi-Fi drops during digital sharing. For printer jams, keep a second paper roll loaded and a pair of clean cotton gloves nearby to handle thermal paper without leaving fingerprints.
Reliable internet connectivity powers real-time social sharing features, but offline mode stores images for later delivery when the signal drops. Activate offline mode as a default setting and treat live sharing as a bonus rather than a requirement. This mindset shift alone prevents a lot of event-day stress.
Brief your booth attendant or volunteer on these safety and troubleshooting protocols before guests arrive:
- Do tape all cables flat to the floor before doors open
- Do keep a printed quick-fix card at the booth with restart steps for common errors
- Do position a staff member within sight of the booth during peak hours to manage guest flow
- Don’t allow guests to lean on or grab the booth structure for balance
- Don’t leave the booth unattended during high-traffic periods
- Don’t attempt hardware repairs during the event. Restart software first, then switch to backup equipment if the issue persists
Managing guest flow is as much a safety concern as it is an experience concern. A line of eight people crowding a small booth area creates trip hazards and frustration. Use retractable stanchions or a simple rope guide to create an orderly queue that keeps the area clear.
What best practices maximize guest engagement at photo booth setups?
Photo booth placement near entrances or high-traffic areas maximizes guest engagement while keeping venue flow unobstructed. The sweet spot is visible from the main gathering area but not blocking any primary pathway. At weddings, this is often near the cocktail hour space. At corporate events, it works well adjacent to the registration table where guests naturally pause. You can explore optimal booth placement strategies to match your specific venue layout.
Props and signage do more work than most organizers realize. A well-curated prop table with themed items, a clear “Start Here” sign on the booth, and a hashtag display board near the unit all reduce hesitation and increase participation. Guests who might walk past a bare booth will stop for one that looks fun and inviting. Change props between event segments, such as swapping cocktail-hour props for reception props at a wedding, to keep the experience fresh.
Customization turns a generic rental into a branded memory. Customizing the booth experience with event logos, themed digital overlays, and color-matched backdrops makes every print feel like a keepsake rather than a novelty. For corporate events, branded print templates double as marketing collateral that guests take home. For weddings, custom monogram overlays on a glam booth or vintage photo booth create a cohesive aesthetic that photographs beautifully.
Engagement tips that consistently deliver results across event types:
- Place a mirror or sample print display near the booth entrance so guests can see what the output looks like before committing
- Assign one staff member specifically to the prop table to keep items organized and encourage shy guests to participate
- Display a live social feed on a nearby screen showing booth photos tagged with the event hashtag
- For corporate events, offer instant digital delivery to work email addresses to increase participation among guests who do not want a physical print
- At kids’ parties or casual celebrations, lower the prop table height and add oversized, easy-to-hold items to encourage younger guests
Pro Tip: Train your booth attendant to greet every approaching guest by name if possible, or with a warm opener like “Ready to make some memories?” This 10-second interaction converts hesitant guests into enthusiastic participants far more reliably than any sign.
Key takeaways
Successful venue photo booth preparation requires coordinating space, power, cable safety, and guest engagement before a single guest arrives.
| Point | Details |
|---|---|
| Space planning comes first | Measure and photograph your venue zone before load-in to avoid day-of surprises. |
| Power needs a dedicated circuit | Never share a booth outlet with high-draw equipment to prevent mid-event outages. |
| Gaffer tape is non-negotiable | Secure cables every 12 to 18 inches with gaffer tape for safety and clean removal. |
| Simulate before guests arrive | Walk through the full guest workflow yourself to catch every friction point early. |
| Placement drives participation | Position the booth near high-traffic areas for maximum visibility without blocking flow. |
What we have learned from setting up hundreds of booths
After working hundreds of events across San Antonio, from intimate backyard celebrations to large corporate galas, the pattern is clear. The events that go smoothly are not the ones with the fanciest equipment. They are the ones where the organizer showed up early, tested everything twice, and briefed their team before the first guest walked in.
The most common mistake we see is treating setup as a 15-minute task. A magic mirror booth alone takes 30 to 45 minutes to set up and test properly, and that is before you account for backdrop wrinkles, a printer that needs recalibration, or a venue that moved your reserved outlet. Build in a full hour of buffer time and you will never feel rushed.
We also believe strongly that simulating real guest interactions before the event opens is the single highest-value step most organizers skip. Problems that seem invisible during setup become obvious the moment someone unfamiliar with the booth tries to use it. That simulation costs you five minutes and saves you from a line of confused guests at peak hour.
Working with a reliable vendor who provides backup equipment and real-time support changes the entire experience. You stop managing a piece of equipment and start hosting a party. That is the outcome every event organizer deserves.
— RMD
Ready to make your next event truly shine?
At Rmdphotobooths, we bring the preparation expertise, the equipment, and the enthusiasm so you can focus on your guests. From magic mirror setups to 360° booth experiences and everything in between, our team handles every step of the photo booth installation process with care.

Whether you are planning a wedding, a corporate event, or a private party in San Antonio, we offer personalized booth experiences designed to match your vision and wow your crowd. Over 1,000 five-star reviews back up what we do. Explore our full range of photo booth experiences or go straight to our booking page to reserve your date. We would love to be part of your celebration.
FAQ
What is the minimum space needed for a photo booth at a venue?
A magic mirror photo booth requires at least an 8×8 foot footprint plus 4 to 6 feet of clear guest space in front of the unit. A 360° spin booth needs a 10×10 foot open circle to operate safely.
How long does photo booth setup take at a venue?
A magic mirror booth takes 30 to 45 minutes to set up and test, not counting backdrop installation or prop arrangement. Budget a full hour of setup time to handle unexpected challenges without rushing.
What type of tape should be used for photo booth cables?
Gaffer tape is the professional standard for securing floor cables at events. It holds firmly, has a matte finish that prevents glare, and removes cleanly from venue floors without leaving residue.
How do you troubleshoot a frozen touchscreen during an event?
Restart the booth software first, since most touchscreen freezes are caused by software rather than hardware failure. If the issue persists, switch to a backup device or contact your rental provider’s technical support line.
Where is the best place to position a photo booth at a venue?
Place the booth near a high-traffic area such as a venue entrance, cocktail space, or registration table. This maximizes visibility and guest participation while keeping primary pathways clear and unobstructed.
